
Tile niper for small cuts is one of those tools you don’t appreciate until you’re stuck with a 1/8-inch sliver, a curved notch around a pipe, or a tiny corner that your wet saw can’t safely grab.
If you’ve ever tried to “just shave a little bit off” with the wrong tool, you already know how it goes: chipped glaze, a snapped tile, and a pile of waste you didn’t budget for. Small cuts are where DIY tiling usually gets stressful.
This guide breaks down when a tile nipper is the right move, how to get cleaner results, and when you should stop forcing it and switch to another method. You’ll also get a quick checklist and a comparison table so you can make a call fast on the job.
What a tile nipper does well (and what it doesn’t)
A tile nipper is basically a controlled “biting” tool that removes small pieces of tile. The key word is controlled. It’s not for long straight cuts, and it’s not meant to replace a wet saw.
Where it shines is detail work: slight edge adjustments, small notches, gentle curves, and fitting cuts that need a little sneak-up approach.
- Good for: tiny trims, irregular edges, rounding corners, nibbling around electrical boxes or pipe penetrations (when the notch is small).
- Not great for: thick porcelain, long straight lines, glass tile, or any cut where the finished edge will be front-and-center without trim.
According to OSHA, hand tools still need basic protections like eye protection and safe handling practices, especially where chipping and flying fragments can happen.
Common reasons small cuts go wrong
Most “my tile keeps cracking” complaints come down to technique and expectations, not the tool being useless. Small cuts ask for patience, which is not what people want to hear mid-project.
- Biting off too much at once: If you try to remove a big chunk, the force travels and the tile fractures past your line.
- Nipping from the wrong side: Glazed ceramic tends to chip if you attack the finish face carelessly.
- Skipping a score line: A light score with a utility knife, carbide scribe, or rubbing stone can help guide the break in many cases.
- Using a dull or cheap jaw: Worn jaws crush instead of cut, leaving a ragged edge and micro-cracks.
- Wrong tile type: Dense porcelain often fights a nipper; you may get random breaks instead of clean bites.
A tile niper for small cuts works best when you treat it like sculpting, not chopping. That mental shift matters.
Quick self-check: should you use a nipper here?
Before you commit, run this quick判断清单. It saves broken tiles and time.
- Is the adjustment small? If you need to remove more than about 1/4 inch along a long edge, a saw or snap cutter often makes more sense.
- Will the edge be visible? If it’s a finished edge, plan to dress it with a rubbing stone, or choose a cleaner cutting method.
- Is the tile ceramic (softer) vs porcelain (harder)? Ceramic is usually more forgiving for nipping.
- Do you have room to “sneak up” on the line? Nipping needs extra material so you can take multiple bites.
- Is there backing support? Thin pieces near a corner snap easily if the tile isn’t supported.
If you answered “no” on support or “yes” on a big removal, you’ll probably get a cleaner result switching tools instead of forcing the nipper.
Tile nipper vs other tools (choose the cleaner path)
Small cuts can be made a few different ways, and the “best” option depends on tile material and what the cut needs to look like when it’s installed.
| Tool | Best for | Typical finish quality | Watch-outs |
|---|---|---|---|
| Tile nipper | Micro-trims, gentle curves, irregular nibbling | Fair, improves with sanding | Can chip glaze, struggles on dense porcelain |
| Wet saw | Straight cuts, repeat cuts, clean edges | Good to very good | Hard to safely cut tiny slivers without a jig |
| Angle grinder + diamond blade | Notches, inside corners, fast shaping | Good with practice | Dust, noise, easier to overcut |
| Diamond hole saw | Pipe holes, round penetrations | Very good | Needs steady drilling, cooling often helps |
| Rubbing stone/diamond pad | Edge tuning, easing sharp corners | Finishing tool | Slow for real material removal |
If your goal is a tight fit that hides under trim, a tile niper for small cuts is often efficient. If your goal is a showroom edge, plan for a saw cut plus finishing, or use trim to hide the cut line.
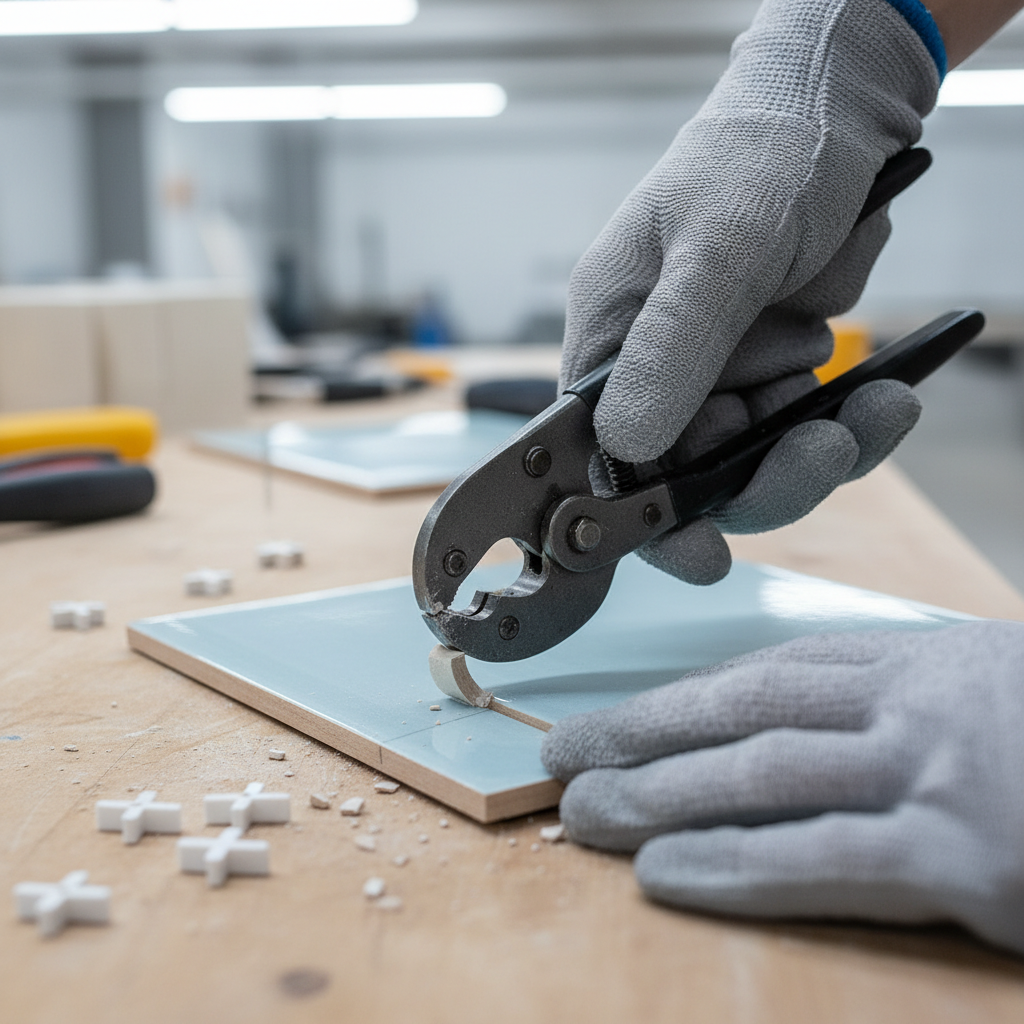
How to use a tile nipper for small cuts (step-by-step)
This is the workflow that usually produces fewer surprises. It’s not fancy, just deliberate.
1) Mark and plan the “waste” side
Use a pencil or fine marker and clearly mark the waste area. For curves, sketch the curve, then add a second line a hair outside it so you can creep in gradually.
2) Support the tile like you mean it
Lay the tile flat on a bench, with the cut area slightly overhanging. If it wobbles, it breaks. A scrap board underneath often helps.
3) Take small bites, working back to the line
Start at the edge and remove tiny pieces. Keep bites consistent. If you feel yourself squeezing harder and harder, that’s usually the tool telling you the bite is too big or the tile is too dense.

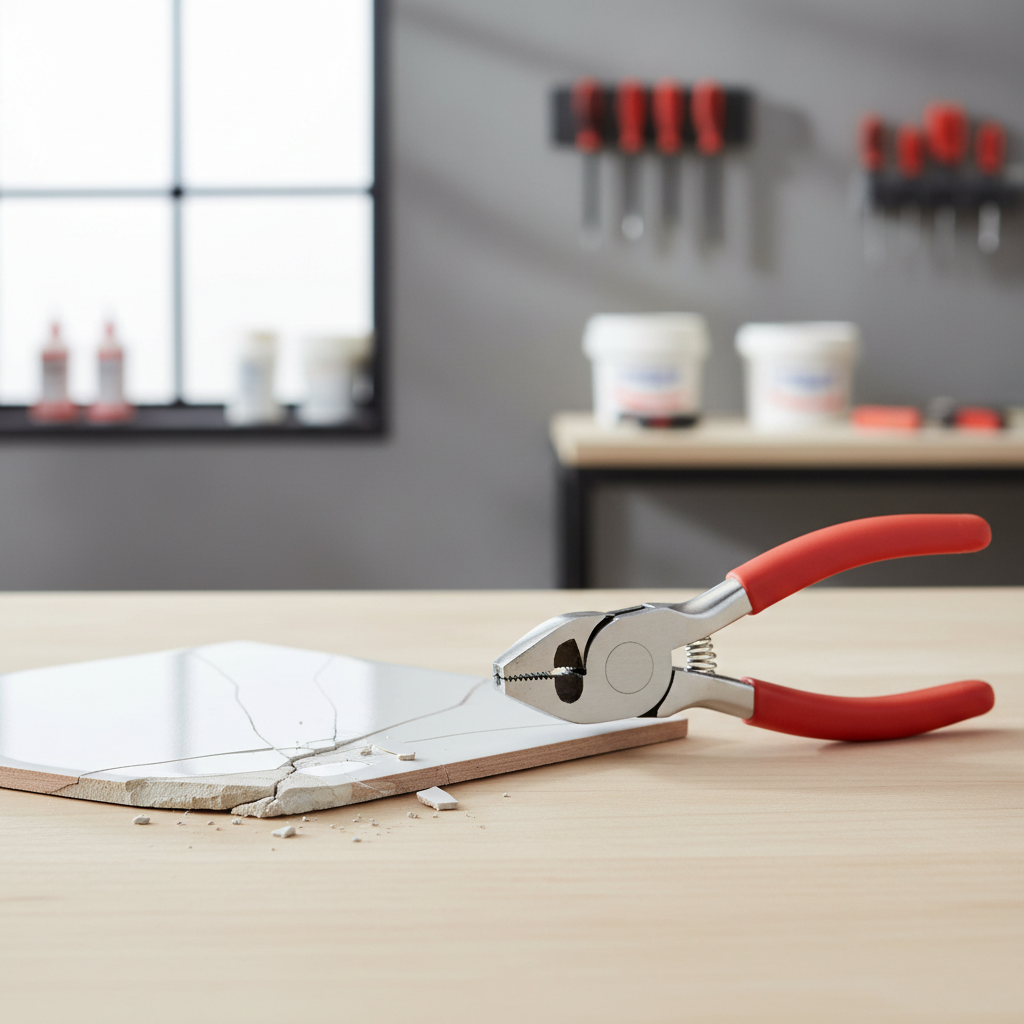
4) Clean the edge with a rubbing stone or diamond pad
Nipping almost always leaves a toothy edge. A rubbing stone knocks down sharp points and helps the piece slide into place without binding on thinset ridges.
5) Dry fit early, not after you “finish” the cut
Dry fit after a few bites. You’re trying to land on a snug fit, not a perfect-looking edge on the bench that ends up too small on the wall.
Practical tips for cleaner results (without buying more gear)
These little habits don’t sound dramatic, but they’re what separate “it works” from “why does it look chewed up.”
- Nip from the back when possible: Many ceramic tiles chip less if the breaking force starts on the underside, then you finish the last hair carefully.
- Score the glaze lightly on the face: A shallow score can reduce random flaking, especially near corners.
- Keep the jaws square to the edge: Twisting while squeezing tends to start cracks.
- Avoid super-thin “fingers”: If a notch leaves a skinny strip, consider redesigning the cut or using trim; skinny strips break during setting.
- Plan hiding strategies: Caulk line, trim profile, or a slightly shifted layout can hide a less-than-perfect nipped edge.
One more honest note: a tile niper for small cuts is often a “good enough” tool, and that’s okay when the edge sits under baseboard, toe kick, or a metal profile.
Safety and when to ask for help
Nipping creates sharp shards. Wear eye protection, and consider cut-resistant gloves if you tend to grip close to the bite point. Keep kids and pets out of the area, fragments bounce farther than you think.
If you’re working on silica-producing materials and you switch to grinding or cutting that generates dust, it’s worth being careful. According to NIOSH, respirable crystalline silica can be a hazard in construction tasks, and controlling dust exposure matters. If you’re unsure what precautions fit your space, a local pro or tool rental shop can usually point you in the right direction.
- Call a pro or upgrade tools if the tile is expensive, the cut edge will be highly visible, or you’re working with thick porcelain and keep losing pieces.
- Consider a different approach if you need repeatable small cuts across many tiles; at that point, a jigged wet saw cut often saves time and material.
Key takeaways before you start cutting
- Small bites win. Most breakage comes from trying to remove too much.
- Support matters more than people think. A stable tile cracks less.
- Finish the edge. A rubbing stone turns “rough” into “installable.”
- Match the tool to the tile. Dense porcelain may call for a saw or grinder instead.
If you’re staring at a tight gap and feeling stuck, grab the nipper, slow down, and dry-fit as you go. That’s usually the shortest path to a clean install.
FAQ
Can I use a tile nipper on porcelain for small cuts?
Sometimes, but it depends on thickness and how dense the porcelain is. Many porcelain tiles chip or crack unpredictably when nipped, so a wet saw, grinder, or diamond pad may be more reliable for the same adjustment.
How small of a piece can a tile nipper remove?
In many cases you can remove tiny “flakes,” but the practical limit is about control, not size. If the tile starts to fracture past your line, take smaller bites and support the tile closer to the cut.
Why does my glazed ceramic tile chip when I nip it?
Glaze is brittle, and the breaking force can pop the surface. Light scoring on the face and nipping from the back side often reduces chipping, then you can dress the edge with a stone.
Do I need to sand or stone the edge after nipping?
Usually yes, especially if the edge will touch another tile or a trim profile. A rubbing stone or diamond hand pad can smooth high spots fast and improve the fit.
Is a tile nipper better than an angle grinder for notches?
For tiny, controlled adjustments, a nipper can feel safer and cleaner. For larger notches, inside corners, or harder tile, a grinder often works faster, though dust control becomes a bigger concern.
How do I keep a tile from cracking while nipping?
Support the tile on a flat surface, keep your bites small, and avoid twisting the tool mid-squeeze. If cracks keep starting, it may be the tile type or a sign the bite size is too aggressive.
What’s the best way to make a clean curve for a pipe?
If the pipe hole is fully inside the tile, a diamond hole saw usually gives the cleanest result. If it’s a partial curve at the tile edge, you can combine saw cuts and careful nipping, then smooth with a diamond pad.
If you’re doing a backsplash or shower and want a more predictable finish without wasting a stack of tiles, it can be worth choosing a sturdier tile nipper, pairing it with a rubbing stone, and practicing on a couple of scrap pieces before you cut the “real” tiles.