
Heat shrink tubing assortment kit purchases usually go wrong for one boring reason: the kit looks “complete,” but it’s missing the sizes, shrink ratio, or adhesive lining your project actually needs.
If you’ve ever shrunk a tube and still had a loose fit, or watched it split when you hit it with heat, you already know the frustration. A good kit isn’t about having 500 pieces, it’s about having the right mix for the wire gauges you touch most, plus a few “save the day” sizes for repairs.
This guide helps you pick a kit that matches real-world wiring work, automotive fixes, marine connections, DIY electronics, and shop maintenance. You’ll get a quick checklist, a sizing table, and practical steps so you don’t buy twice.
What a “good” assortment kit actually includes
Most kits differ in three places: shrink ratio, material type, and size distribution. The packaging rarely makes that obvious, so it’s worth slowing down for a minute.
- Shrink ratio (2:1 vs 3:1): 2:1 works for clean, consistent diameters. 3:1 covers more “unknowns,” like splices, odd connectors, or slightly damaged insulation.
- Adhesive-lined vs standard: Adhesive-lined (dual-wall) shrinks and seals. Standard (single-wall) insulates and provides strain relief, but usually won’t waterproof.
- Temperature and flame behavior: Many general-purpose tubes are polyolefin. Some applications call for special specs (low-smoke, diesel-resistant, etc.), which typical variety kits may not meet.
According to UL Solutions, heat-shrink tubing is commonly evaluated for properties like flammability, insulation performance, and environmental resistance under specific standards, so “looks similar” doesn’t always mean “rated the same.” If you’re working on regulated equipment, check your required spec before relying on a generic box.
Common use cases in the U.S. (and what kit features matter)
Buying the right assortment starts with where the wiring lives. Same tube, different outcome.
Automotive and powersports
Heat, vibration, and moisture show up together. Many people do fine with 3:1 polyolefin plus a handful of adhesive-lined pieces for splices near splash zones.
Marine wiring and outdoor gear
Salt and humidity punish bad seals. If you’re doing boat or dock work, a kit that includes adhesive-lined options (or you add a small pack separately) usually saves time later.
DIY electronics and hobby projects
Here, neatness and insulation matter more than sealing. A standard 2:1 kit with more small diameters is often more useful than a “huge” kit dominated by big sizes you never touch.
One more real-world note: if you frequently repair cords, power tools, or extension leads, you’ll want more medium-to-large sizes than most “electronics-focused” kits provide.
Quick self-check: which kit profile fits you?
If you answer “yes” to the left side, lean toward the kit type on the right.
- Do you cover splices or butt connectors often? → 3:1 ratio with several mid sizes
- Does water spray, condensation, or bilge moisture happen? → Adhesive-lined pieces included
- Mostly small gauge wires (sensors, LEDs, RC)? → More 1/16" to 1/4" sizes
- Do you label or color-code harnesses? → Multiple colors (not only black)
- Do you need a clean look for installs? → Thin-wall polyolefin, consistent shrink
And if you’re unsure, a practical compromise is a standard kit for daily use plus a small add-on pack of adhesive-lined tubing for “wet” fixes.
Sizes, wire gauge, and shrink ratio: a simple matching table
Most shoppers get stuck on diameter. The trick: choose tubing that fits over the largest point (connector or splice), while shrinking small enough to grip the insulation.
| Typical use | Wire range (rough) | Common recovered fit goal | Suggested ratio |
|---|---|---|---|
| Small electronics leads | 26–18 AWG | Snug over thin insulation | 2:1 |
| General splices, sensors | 18–12 AWG | Grip over splice barrel | 3:1 (or 2:1 if consistent) |
| Automotive primary wire | 14–10 AWG | Durable strain relief | 3:1 |
| Battery / heavier leads | 8 AWG and larger | Cover lugs and step-ups | 3:1 (often easier) |
Because insulation thickness varies by manufacturer and application, treat this as a starting point. When in doubt, measure the outside diameter of the splice area and pick a tube with an expanded diameter slightly larger than that.
How to use heat shrink tubing so it doesn’t fail later
A solid heat shrink job is mostly prep. The shrinking part takes seconds, and that’s why people rush it.
Step-by-step
- Cut clean: A square cut helps prevent edge lifting. Scissors can work, but a sharp blade gives cleaner edges.
- Slide it on before the connection: Everyone forgets once. If you do, you’ll be redoing the splice.
- Center the tube: Leave even overhang on both sides of the joint to reduce stress points.
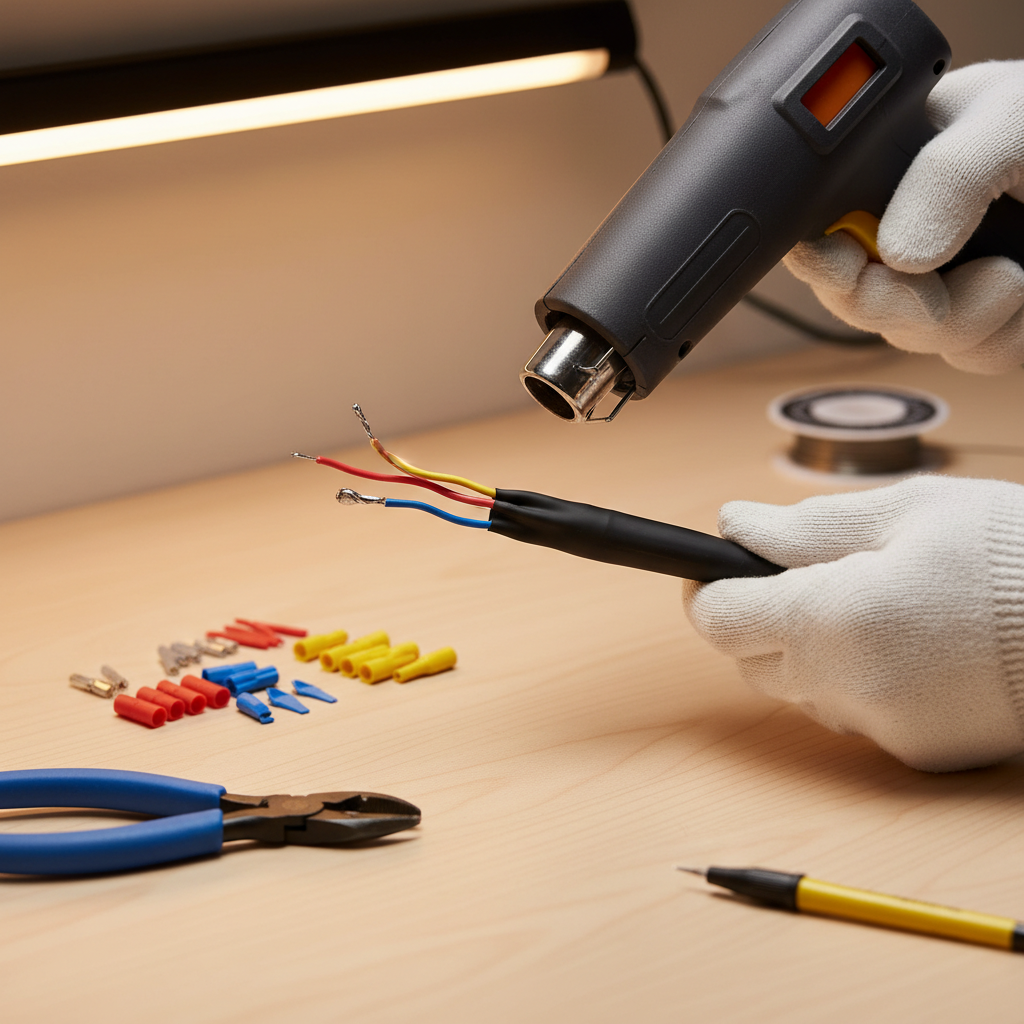
- Heat gradually, rotate: Start a bit farther away, then move closer as it begins to recover. Keep heat moving to avoid scorching.
- For adhesive-lined: Heat until you see a slight bead at the edges, then stop. Overheating can push adhesive out too aggressively.
According to OSHA, heat guns and other hot-air tools can cause burns and can ignite nearby materials if misused, so work on a clear surface, avoid pointing the tool at flammables, and follow the tool manufacturer’s guidance. If you’re in a workplace setting, your safety program may require PPE or specific procedures.

If you see bubbling, charring, or the tube thinning unevenly, that’s usually too much heat too fast, not “bad tubing.”
What to look for when buying a heat shrink tubing assortment kit
When you compare kits, try not to get hypnotized by piece count. A more useful check is: will you actually use the top 80% of the box?
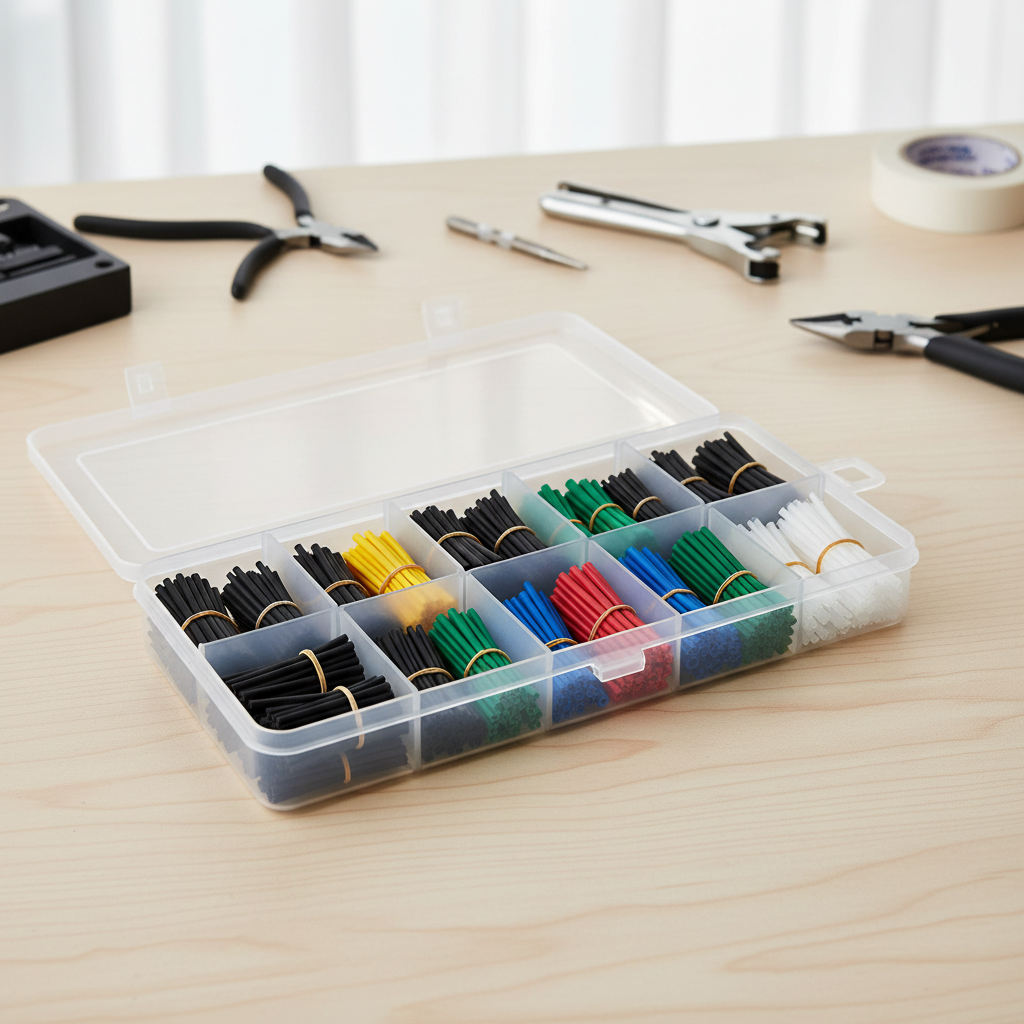
- Size mix: Look for plenty of small and mid diameters. Many kits overload big sizes to inflate count.
- Clear labeling: Printed sizes on the lid or a chart inside saves frustration mid-job.
- Consistent wall thickness: Cheap tubing can shrink unevenly, especially at the edges.
- Color assortment: Black is practical, but red/blue/yellow/white/clear helps troubleshooting and routing.
- Storage case quality: A flimsy organizer turns into a mixed pile after one drop, and then “assortment kit” stops being a kit.
If you need water sealing often, it’s normal to buy a separate dual-wall assortment. Many general kits are single-wall even when the listing feels ambiguous.
Common mistakes (that look like “the kit is bad”)
- Picking diameter off wire gauge alone: connectors and splices usually drive the true diameter.
- Using a lighter: it can work in a pinch, but soot and localized overheating often damage the tube and insulation.
- Trying to seal oil-soaked insulation: adhesive won’t bond well to grime, clean and dry first.
- Expecting waterproofing from single-wall tubing: it insulates, but sealing needs adhesive-lined tubing or another sealing method.
- Over-shrinking: too much heat can make the tube brittle over time, especially in hot environments.
When to consider a pro-grade spec or professional help
If you’re wiring anything safety-critical or regulated, a basic heat shrink tubing assortment kit might be the wrong tool. Think aircraft, medical devices, certain industrial panels, or customer installations with compliance requirements.
- If you need specific ratings (UL, VW-1, low-smoke), verify the exact product spec sheet, not just the listing title.
- If the circuit carries high current or lives near heat sources, consider consulting a qualified electrician or technician, since insulation choice and strain relief design can affect safety.
- If you see recurring failures, the root cause might be connector selection, crimp quality, or wire sizing, not the tubing.
Key takeaways before you click “Buy”
A good kit is the one you actually reach for every week. For many DIY and shop tasks, a mix of small-to-mid sizes, dependable shrink behavior, and clear labeling beats a giant piece count.
- Pick 3:1 if you cover splices and mixed diameters often.
- Add adhesive-lined if water exposure is even “sometimes.”
- Buy for your common wire sizes, not the biggest project you might do once.
If you want one next step, open your toolbox and note the top three wire gauges and connector types you use most, then choose an assortment that heavily covers those diameters.
FAQ
What is included in a typical heat shrink tubing assortment kit?
Usually multiple diameters and colors of polyolefin tubing in a plastic organizer. Some kits include only single-wall tubing, while others add a small selection of adhesive-lined pieces.
Is 3:1 heat shrink always better than 2:1?
Not always. 3:1 gives flexibility over odd shapes, but 2:1 can look cleaner on consistent wiring runs and may be plenty for electronics work where diameters stay predictable.
Can I use heat shrink tubing for waterproof connections?
Often yes, but typically you want adhesive-lined (dual-wall) tubing and a clean, dry surface. If the joint lives underwater or in harsh marine conditions, consider a more specialized sealing approach.
Why does my tubing split or wrinkle when heating?
Splitting often comes from overheating or using a tube that’s too small for the connector bulge. Wrinkling can happen when the tube shrinks unevenly, try rotating the work and applying heat more gradually.
Do I need a heat gun, or can I use a lighter?
A heat gun is easier to control and usually gives more consistent results. A lighter may work for quick fixes, but it increases the chance of scorching and leaving soot on the tubing.
How do I choose the right size without guessing?
Measure the outside diameter of the thickest part you must cover, then choose tubing with an expanded diameter slightly larger than that. If you can’t measure, 3:1 tubing reduces risk for mixed shapes.
Does color matter, or should I buy all black?
All black is common for automotive and clean installs, but multi-color kits help identify circuits and make future troubleshooting less annoying, especially in DIY panels and harnesses.
A practical buying nudge (without overthinking it)
If you’re building a small home kit or restocking a shop drawer, pick one heat shrink tubing assortment kit that matches your everyday wire sizes, then add a small adhesive-lined pack for outdoor or “wet” repairs, it’s usually the simplest way to stay prepared without buying a giant specialty set.