
how to use a center punch to mark drill points comes down to one simple goal, give your drill bit a tiny “home” so it doesn’t skate across metal, hardwood, or plastic when you start the hole.
If you’ve ever watched a bit wander off your layout line, you already know why this matters, a small slip at the start can turn a clean bracket install into an oval hole, a misaligned bolt pattern, or a scratched finished surface.
This guide stays practical, which punch to pick, how hard to strike, how to handle thin sheet metal, and what to do when the dimple looks wrong. I’ll also flag a few safety habits that many people skip until a tool bounces in a bad way.

What a center punch does (and when you actually need it)
A center punch makes a small conical indentation at your drill location. That indentation helps the bit’s tip stay centered when the drill starts, especially on slick or curved surfaces.
You don’t need a punch for every hole. On softer wood, a sharp brad-point bit often starts clean without it, and on some plastics a punch can crack the surface. But in metalwork, hardware installs, and any time your mark must stay precise, it’s usually worth the 10 seconds.
- Most useful on: steel, aluminum, stainless, brass, coated metal, round stock, and already-painted surfaces where a bit tends to skate.
- Sometimes optional on: softwood, plywood, MDF with a brad-point bit.
- Use caution on: brittle plastics, acrylic, glass-like composites, thin sheet where distortion matters.
According to OSHA, hand and power tools can create strike and flying-fragment hazards, so eye protection and stable work holding are part of “doing it right,” not an extra.
Pick the right tool: manual punch vs automatic punch
There are two common styles, and each has a place. The mistake is assuming “a punch is a punch,” then fighting inconsistent marks.
Manual center punch (hammer-driven)
- Best for thicker metal, harder alloys, larger dimples, or when you want full control over strike force.
- Tradeoff takes one hand for the punch and one for the hammer, work holding matters more.
Automatic center punch (spring-loaded)
- Best for quick layout work, one-handed marking, ladders or awkward positions, lighter dimples in sheet metal.
- Tradeoff can be underpowered on tough steel, and cheaper ones vary in consistency.
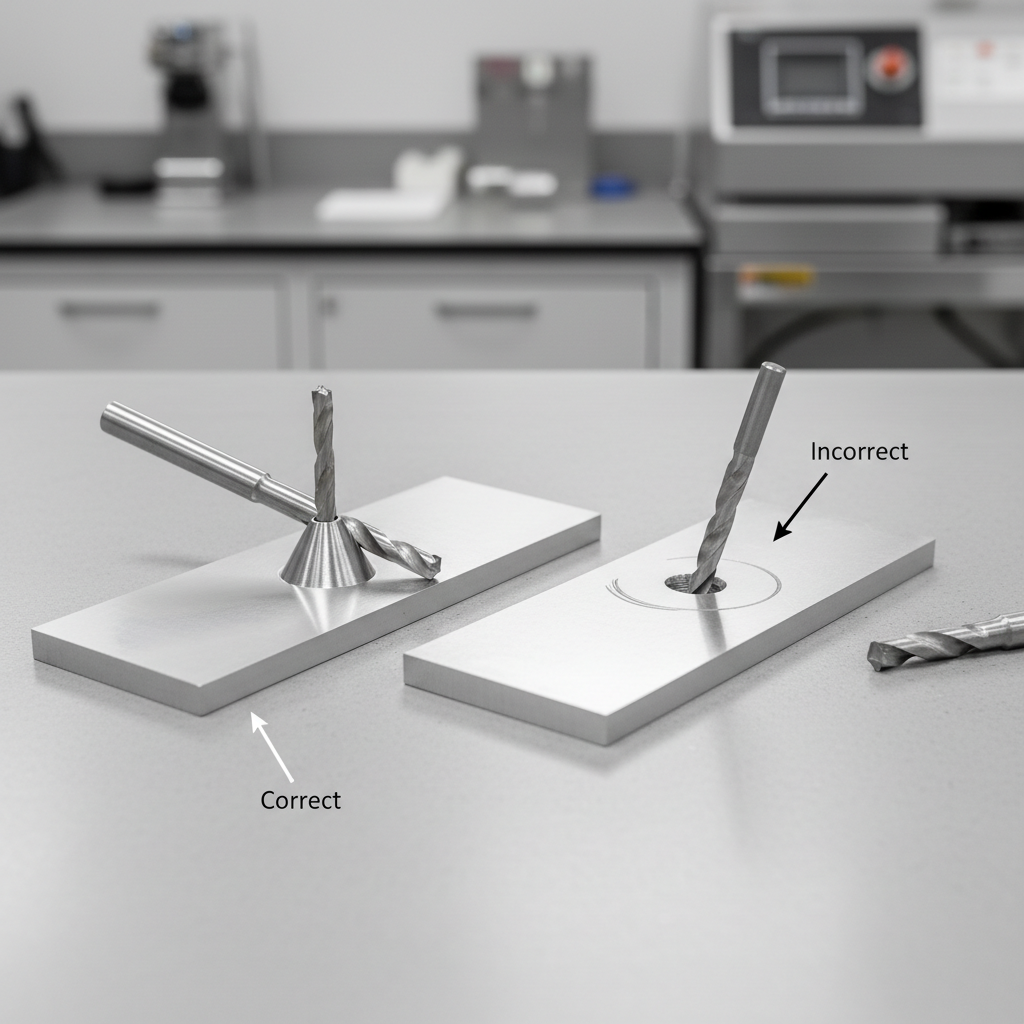
Tip that saves frustration: if your drill bit still walks after punching, the usual culprit isn’t “not enough force,” it’s that the punch wasn’t truly vertical, or your layout mark wasn’t crisp.
Prep work that makes the punch mark land exactly on target
The cleanest punch marks start before the punch touches the work. You’re trying to remove wiggle room, both in your mark and in the material.
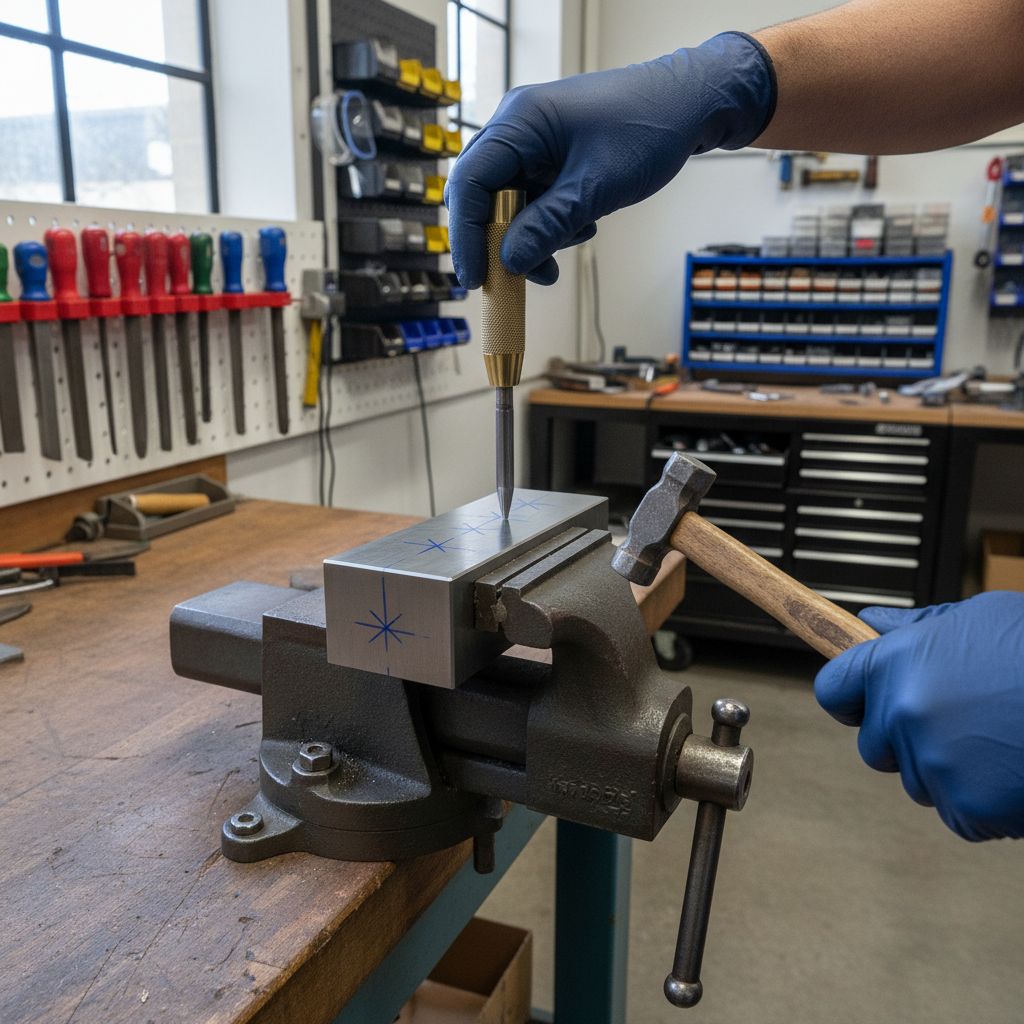
- Secure the work with a vise or clamps, especially on metal. Holding a part by hand while striking is where slips happen.
- Make a real layout mark you can “feel.” A pencil dot on shiny steel is a guess, use a scribe, fine marker, or layout dye if you have it.
- Flatten burrs and wipe oil. A punch sitting on a burr leans without you noticing.
- Start with a light tap on manual punches when precision matters, then deepen the mark after confirming placement.
For round stock or pipe, make it stop rolling before you think about accuracy. A V-block, a vise with soft jaws, or even a wood cradle often makes the difference.
Step-by-step: how to use a center punch to mark drill points
This is the “boring” part people rush, but it’s where accuracy comes from. If you do these steps cleanly, drilling feels almost guided.
Manual center punch (with hammer)
- Place the tip on your crosshair intersection or center mark, then angle-check from two directions so the punch stands vertical.
- Seat it with a light tap to create a tiny pilot dimple. This tap is about placement, not depth.
- Recheck alignment by nudging the punch tip into the dimple, it should “lock in” without sliding.
- Strike once firmly to deepen the dimple. On harder steel, two controlled strikes often beat one wild hit.
Automatic center punch
- Set the tip on the mark, keep the punch as vertical as you can.
- Press straight down until it snaps, avoid any sideways load during the snap.
- Repeat once if you need a deeper dimple, but stop if the metal starts to dish or distort.
Key point: the dimple should be just deep enough that the drill bit’s point naturally centers. Too shallow and the bit wanders, too deep and you can make thin material pucker.
How deep should the punch mark be? A practical guide
Depth depends on your bit size, material hardness, and how accurate the hole placement needs to be. In many cases, you’re aiming for “enough to start cleanly,” not “as deep as possible.”
| Material / situation | Typical punch mark | Extra tip |
|---|---|---|
| Steel plate (general drilling) | Medium dimple | Use a sharp bit, consider a small pilot drill first |
| Stainless steel | Medium-to-deeper dimple | Go slow, use cutting fluid if appropriate |
| Thin sheet metal | Light-to-medium dimple | Support the backside to reduce distortion |
| Aluminum | Light-to-medium dimple | Too deep can create a raised burr around the mark |
| Wood (with twist bit) | Very light mark | An awl is often enough, test on scrap if finish matters |
If you’re drilling a large final hole, a punch alone may not be the full solution. A center mark plus a small pilot hole often produces cleaner accuracy than trying to start a 1/2-inch bit in one go.
Quick self-check: are you punching correctly?
If your holes still land off-center, use this short checklist before you blame the drill or the bit. Most problems show up here.
- The punch mark “looks centered” but drills off: punch was tilted, or the drill was started at an angle.
- The punch skates before it bites: surface oil, coating, or too-light initial contact, clean and re-mark.
- Mark is centered but drill bit still wanders: dimple too shallow, bit dull, or starting speed too high on metal.
- Thin metal dents or dishes: punch too deep or no backing support.
- Multiple holes in a pattern drift: layout error, inconsistent reference edge, or measuring from the wrong face.
Practical fix: if you missed your exact point by a hair, you can “walk” the dimple by angling the punch slightly toward the target and tapping lightly, then re-punch vertically. Do it gently, aggressive correction usually makes a mess.
Common mistakes and safety notes (the stuff that prevents dumb damage)
Center punching is simple, but it’s also impact work, things can slip, bounce, or chip. A few habits keep it controlled.
- Skipping eye protection: small chips can pop off hardened tools or brittle coatings. According to NIOSH, eye protection helps reduce risk from flying particles in tool use.
- Holding the work by hand: even a small tap can shift the piece, then your next strike goes somewhere else.
- Using the wrong hammer: a tiny tack hammer on thick steel leads to repeated strikes and more chances to slip.
- Over-punching thin sheet: you can create a raised volcano around the dimple, the drill bit then grabs and chatters.
- Punching on finished surfaces without protection: masking tape or a protective film can help reduce cosmetic scratches, but test first.
If you’re working near wiring, fuel lines, or structural members, it’s worth slowing down and confirming what sits behind the surface. When in doubt, asking a qualified professional is often the safer call.
Practical workflow: from punch mark to clean drilled hole
People often stop at the punch mark, then wonder why the hole still looks rough. A quick, consistent workflow helps.
- Center punch on a clean, visible layout intersection.
- Pilot drill when the final hole is large or accuracy is tight, a smaller bit is easier to keep centered.
- Drill at the right speed for the material, too fast on metal increases skating and heat.
- Use cutting fluid when appropriate on tougher metals, follow the product guidance and shop rules.
- Deburr with a countersink or deburring tool so hardware seats flat.
Key takeaway: the punch sets the location, your drill technique preserves it. If you start the drill at an angle, even a perfect dimple can’t fully save you.
Conclusion: the small mark that saves the whole job
Once you get comfortable with how to use a center punch to mark drill points, drilling feels less like “hoping it starts straight” and more like placing the hole where you intended, especially on metal and curved stock.
If you want one action step, clamp the work and do a light seating tap before committing to a deeper strike. That tiny pause catches most accuracy problems early, when they’re still easy to fix.