
how to use a multi tool for basic repairs starts with a simple idea: pick the right attachment, lock it in safely, then let the tool do the work instead of forcing it. If you have ever tried to tighten a loose cabinet hinge, cut a zip tie in a tight spot, or sand a rough edge and ended up grabbing three different tools, a multi tool is the “one handle, many jobs” solution that usually saves time.
That said, most frustration comes from two things: using the wrong bit for the material, or pushing too hard and stripping fasteners, dulling blades, or scuffing surfaces you wanted to keep clean. A little setup changes everything, and it is the difference between a quick fix and a small mess that turns into a bigger project.

This guide stays practical: which multi tool types work for basic repairs, how to choose the right attachment fast, a quick “am I about to break something” checklist, and a few common repairs you can copy step by step. I will also call out where you should stop and bring in a pro, because some tasks look small until they are not.
Pick the right kind of multi tool (because the name is confusing)
In the U.S., “multi tool” can mean two common products, and they behave very differently during repairs. Once you know which one you have, the rest of the decisions get easier.
- Pliers-based multi-tool (Leatherman-style): best for gripping, bending, pulling, cutting small wire, and quick screwdriving. Great for “something is loose” and “I need leverage.”
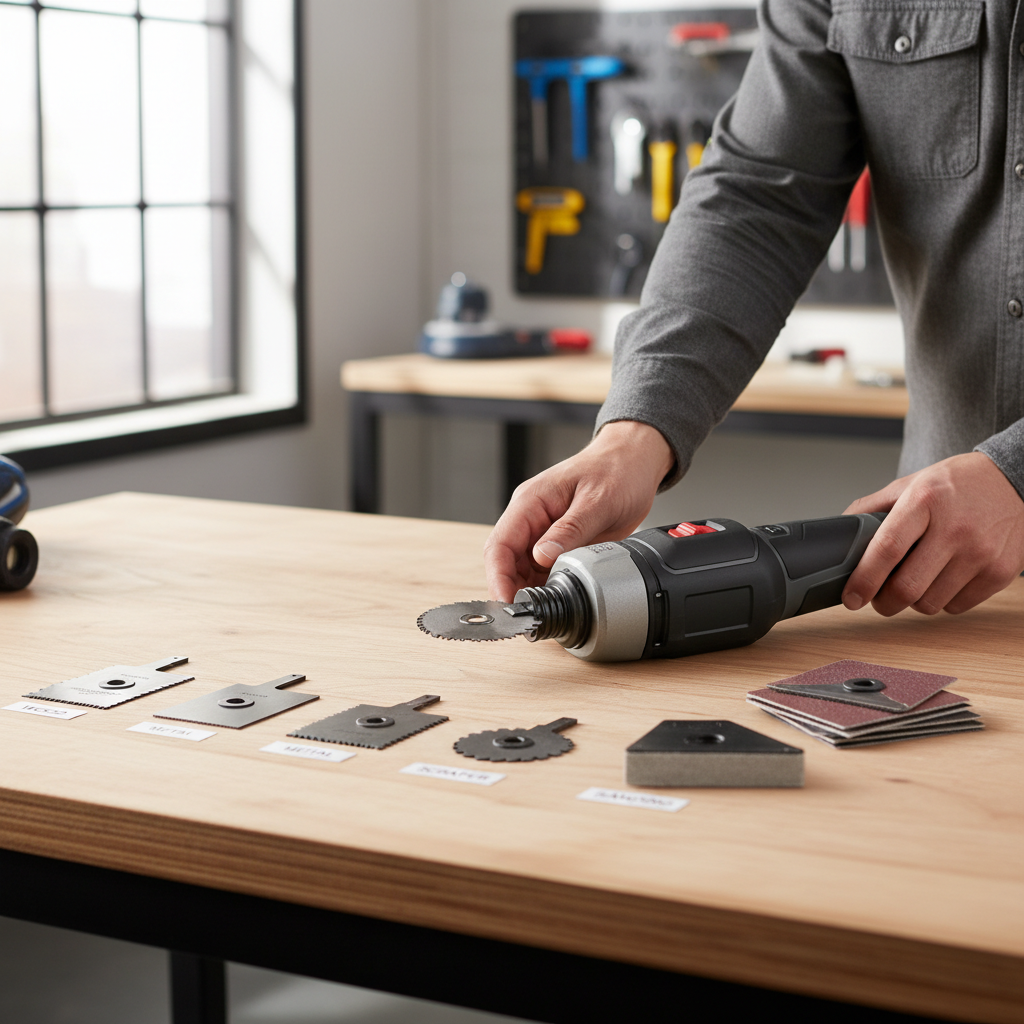
- Oscillating multi-tool (powered): best for cutting, trimming, scraping, and sanding in tight spaces. Great for “I need to remove material carefully.”
If your goal is basic home repairs, many households get the most day-to-day value from a pliers-based multi-tool plus a small bit kit. If you do trim, flooring touchups, grout scraping, or drywall patching, the oscillating version earns its space quickly.
Safety and setup that prevents most mistakes
Multi tools make small jobs feel casual, which is exactly why people slip up. According to OSHA, using the right personal protective equipment and following tool safety practices reduces injury risk on common tasks, and the same logic applies at home.
- Eye protection: especially when cutting, scraping, or snapping blades. Little shards travel farther than you expect.
- Gloves, selectively: helpful for grip and sharp edges, but avoid bulky gloves near powered moving parts where they could catch.
- Stable work: clamp when possible, or at least brace the workpiece. “One hand holding, one hand cutting” is where problems start.
- Right torque mindset: stop when resistance spikes. Over-tightening is how screws strip and hinge plates twist.
- Power tool basics (oscillating): unplug or remove battery before swapping blades, confirm the accessory is seated, then test at low speed first.
If you are working near wiring, gas lines, or plumbing you cannot see, slow down and consider a different approach. A shallow cut can still hit something important.
Attachment selection: a quick table you can actually use
This is the part that makes how to use a multi tool for basic repairs feel straightforward. Match the task to the attachment, then match the attachment to the material.
| Repair task | Pliers-based multi-tool | Oscillating multi-tool | Notes that matter |
|---|---|---|---|
| Tighten a loose hinge / handle | Phillips/flat bit, bit extender | Not typical | Use the exact bit size, worn bits cam-out and strip screws |
| Cut a zip tie or thin plastic | Knife blade or scissors | Flush cut blade (carefully) | Shield surrounding surfaces, plastic nicks are permanent |
| Strip small wire ends | Wire stripper notch (if included) | Not recommended | Match gauge, too small cuts strands and weakens the wire |
| Remove old caulk residue | Scraper edge (limited) | Rigid scraper blade | Gentle passes beat digging in and scratching tile or tub |
| Trim door jamb/shim | Saw (slow) | Wood plunge-cut blade | Mark depth, stop often, check fit rather than guessing |
| Sand a small patch | Sandpaper (by hand) | Sanding pad + grit sheets | Start higher grit than you think, you can always go coarser |
Key point: if you are “kind of between sizes,” do not improvise. With screw bits, “almost fits” is the fastest route to a stripped head.
A fast self-check before you start (30 seconds, saves headaches)
Before you apply force, run through this quick list. It helps you decide whether this is a normal DIY fix or a “pause and rethink” moment.
- Do I know what material I am touching? Painted drywall, soft pine, and aluminum all respond differently.
- Is anything hidden behind this surface? If not sure, assume wiring/plumbing could be nearby.
- Can I clamp or stabilize it? If it moves, your tool will slip.
- Do I have the exact bit/blade? If not, switching tools is often safer than forcing a close match.
- What is my “stop signal”? For example: screw spins without tightening, blade heats up, plastic starts melting, or you smell burning.
If two or more answers feel uncertain, it may still be doable, but go slower and test on an inconspicuous area first.
Step-by-step: common basic repairs with a multi tool
1) Tighten a loose cabinet hinge without stripping screws
This is where a multi tool with a good bit kit shines. The trick is alignment and controlled pressure.
- Open the door enough to access screws comfortably, then support the door with your free hand so the hinge is not under weird tension.
- Seat the correct bit fully, keep the handle straight in line with the screw.
- Turn until the screw stops, then give a small additional snug turn, not a crank.
- If the screw never tightens, stop. You may be dealing with a stripped hole, which needs a different fix such as longer screws or wood filler and re-drill.
Reality check: a multi tool can tighten, it cannot fix a damaged hinge plate or a blown-out particleboard hole on its own.
2) Cut and remove a stubborn zip tie in a tight spot
Most accidental scratches happen here. Protect the surface and control where the blade goes after the cut.
- Place a thin barrier behind the tie if possible, a plastic card or a scrap shim works.
- Use a short blade and shallow angle, cut away from what you want to protect.
- After the cut, pause and pull the tie tail away with pliers rather than slicing again.
If the tie sits against wiring insulation, go extra gentle. A small nick in insulation can become a safety issue, and if you suspect damage, consider having an electrician check it.
3) Remove old caulk residue with an oscillating multi-tool scraper
This is one of the cleanest “small win” repairs for an oscillating tool, as long as you avoid digging corners into a tub or tile.
- Use a rigid scraper blade, set speed low to medium.
- Hold the blade nearly flat, let oscillation lift residue rather than gouge.
- Work in short passes, wipe debris often so you can see what you are doing.
- Finish with a hand scraper or pad for detail areas, powered tools are not great in corners.
Ventilation matters if you use solvents after scraping. Follow the product label, and if you feel lightheaded, step away and get fresh air.
4) Quick sanding and edge cleanup after a patch
For small patches, sanding is about control. Over-sanding creates more work than the original repair.
- Start with a finer grit than your instinct, like 120–150 for many wall patches, then adjust.
- Feather the edges outward, do not camp on the center.
- Check by feel with your fingertips, not just by looking, because light can hide ridges.
If you are sanding older paint and you are not sure what is in it, be cautious about dust. According to the EPA, lead-based paint can be present in homes built before 1978, and safe practices may include testing and using lead-safe methods. When in doubt, consulting a professional is the safer move.
Practical tips that make the tool feel “easier” immediately
These are the small habits people pick up over time, and they reduce breakage, frustration, and rework.
- Carry two bit types: Phillips and a couple flat sizes cover more than you think, add Torx if your home uses them.
- Use a bit extender: it improves alignment and keeps your knuckles off cabinets and tight corners.
- Cut slower than you want (oscillating): gentle pressure keeps blades cooler and straighter.
- Mark your cut depth: painter’s tape on the blade works as a quick visual stop line.
- Replace consumables early: dull blades and worn bits make you push harder, and pushing harder is when damage happens.

Key takeaway: the best “upgrade” for how to use a multi tool for basic repairs is rarely the tool itself, it is the right accessory plus the patience to stop when things feel off.
Common mistakes that waste time (and how to avoid them)
- Using one screwdriver bit for everything: it feels efficient until you strip a screw head. Keep a small bit set, even a cheap one beats guessing.
- Over-torquing small fasteners: cabinet hardware, switch plates, and door handles can crack or deform.
- Cutting without a “backer”: a thin scrap behind the cut protects walls, trim, and wire insulation.
- Skipping a test pass: on oscillating tools, do a 1-second touch at low speed to confirm control and vibration feel normal.
- Forgetting the surface finish: matte paint, stainless steel, and acrylic scratch easily, and those marks are hard to hide later.
If you recognize yourself in any of these, that is normal. Most people learn after the first “why did that screw turn into butter” moment.
When to stop and consider professional help
A multi tool can handle plenty of basic repairs, but some situations carry safety or code implications where a pro is the smarter call.
- Electrical work beyond swapping a cover plate: if you see damaged insulation, burnt smells, or loose outlets, consider an electrician.
- Plumbing leaks inside walls: cutting access holes is sometimes necessary, but leak source diagnosis can be tricky and damage spreads fast.
- Structural or load-bearing questions: trimming framing, notching studs, or altering door headers can create bigger issues.
- Possible lead paint or asbestos: testing and containment matter; if unsure, professional guidance is usually worth it.
If you feel stuck deciding, a decent rule is this: if a mistake could create a safety hazard or a costly hidden repair, slow down and ask for help.
Conclusion: a simple way to get confident fast
Once you understand how to use a multi tool for basic repairs, most small jobs stop feeling like a scavenger hunt for the “right tool” and start feeling like a controlled routine. Pick the correct attachment, stabilize the work, apply steady pressure, and stop when resistance tells you something changed.
If you want one action to take today, build a tiny repair kit around your multi tool: a quality bit set, a few spare blades, painter’s tape, and eye protection, then practice on something low-stakes like tightening hardware or trimming a zip tie. The confidence comes quickly when the jobs stay small and the process stays consistent.
FAQ
- What is the easiest way to learn how to use a multi tool for basic repairs?
Start with low-risk tasks like tightening hinges and assembling furniture, then move to light cutting or scraping after you get comfortable swapping attachments and controlling pressure. - Can a pliers-based multi-tool replace a full toolbox?
For quick fixes it often covers a lot, but it will not replace a proper wrench set, a dedicated screwdriver, or power tools when you need consistent torque or precision. - Why do I keep stripping screws with my multi tool?
Usually it is a mismatched bit size or a bit that is worn. Keep the bit fully seated, apply inward pressure, and stop if the bit starts slipping. - Is an oscillating multi-tool safe for cutting near drywall with wiring?
It can be, but risk depends on what is behind the surface. If you cannot confirm clearance, use shallow passes, consider a stud finder with wire detection, or consult a professional. - What blades should I keep on hand for basic repairs?
For many homes: a wood plunge-cut blade, a metal-cut blade, a rigid scraper, and a sanding pad with a few grits cover the common “fix it” tasks. - How do I keep an oscillating multi-tool from burning material?
Reduce pressure, lower speed, and let the blade do the work. Burning often means the accessory is dull or you are forcing the cut. - Can I use a multi tool to remove grout or caulk?
Caulk removal is a common use with a scraper blade. Grout removal is possible with the right grout blade, but it is easy to chip tile, so go slow and practice in an inconspicuous spot.
If you are trying to simplify your home repair setup, a good next step is choosing a multi tool and accessory set that matches the repairs you actually face, not the ones you imagine doing someday, and keeping a small refill stash of bits and blades so you do not end up forcing the wrong attachment at the worst moment.